
12 Apr Storing Your Dutch Oven

Storing Your Dutch Oven
A Dutch Oven is often a costly investment. While they may be expensive at the initial purchase, if you learn how to properly care for, clean, and store your Dutch Oven, they will last a lifetime and can even be passed on to younger family generations. Depending on the purpose and use of your Dutch Oven you may find ways to use it frequently year round at home as well as away. For many others, Dutch Oven cooking is a part of camping and is only used when you are away from home. If you prefer to use your Dutch Oven only when away from home there will be times when you need to store your Dutch Oven, whether for a few weeks or for several months. When your Dutch Oven is not in use it is susceptible to rust or going rancid after periods of non-use; to prevent this you should learn how to properly store your Dutch Oven:
- Before storing your Dutch Oven it is important to make sure that it has been properly cleaned and is free of any food residue. Food residue left in your Dutch Oven can make for a not so pleasant surprise when you open it next season to find mold or other problems. When cleaning your Dutch Oven follow your normal cleaning routine and make sure that it is thoroughly dried.
- With your Dutch Oven cleaned, you need to make sure that it is well coated. Just as you do after cleaning your Dutch Oven normally you should rub on some vegetable oil to ensure the entire surface is coated. Then, using clean paper towels you should rub off extra oil residue. When you are preparing your Dutch Oven for longer storage times you should try to rub off practically all of the oil to keep moisture from building up. Rubbing oil on your Dutch Oven helps to give it a protective coat that will help to resist rust, having too much oil on the Dutch Oven could lead to it going rancid and smelling awful the next time you pull it out.
- Once you have completed the cleaning, conditioning of your Dutch Oven you must take steps to keep it dry while in storage. Some suggestions for keeping moisture from building up inside your Dutch Oven include laying a paper towel in the bottom or lining it with newspaper. This allows for a way to wick or remove any moisture that might build up in the Dutch Oven.
- You want to ensure there air flow for your Dutch Oven. Simply propping or tilting the lid will allow for a small amount of air to continually circulate through your Dutch Oven. You can also use newspaper set between the lid and the kettle (or bowl) of the Dutch Oven to keep the lid propped open just enough to allow for some air flow. Added air flow will help in keeping your Dutch Oven from going rancid as well as allow moisture to escape.
- Moisture is the enemy to Dutch Ovens, so you need to choose a dry place for extended storage. Storing the Dutch Oven inside your basement, garage, or even your trailer will ensure that it does not rust on the outside due to exposure to the elements. If you live in particularly humid areas you will need to be more concerned with the storage location than if you live in dryer western states.
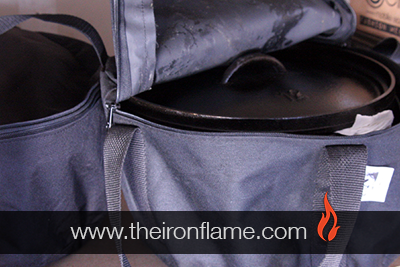
- Choose a quality storage container to keep your Dutch Oven in. While it is not necessary to keep your Dutch Oven in a specific case, a covering of some kind will help to protect it as well as make it more portable if you take it from one location to another. There are boxes and cases that are specifically designed for Dutch Oven storage, but even an old pillow case will do the trick. Covering your Dutch Oven helps to keep the grime off as well as helps to pull away the moisture. In addition, a Dutch Oven stored inside of a container or bag of some kind is less likely to be invaded by critters.
With your Dutch Oven properly cleaned, wrapped, and stored you can leave it for several months without worry. When you’re ready to begin the next camping and Dutch Oven cooking season, simply remove it from its storage space, take it out of the container, and open it up. If it looks and smells good a quick application of some fresh vegetable oil followed by wiping out with a clean, dry paper towel and your Dutch Oven will as good as new and ready for your next fabulous Dutch Oven cooked meal.
No Comments